Accessing Bus Schedules
You can access bus schedules using either a BusQuest mobile app or a browser
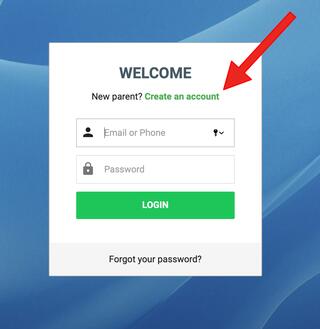
Step 1
Visit https://www.ezrouting.com/sdstpa#/ and click on Create an account
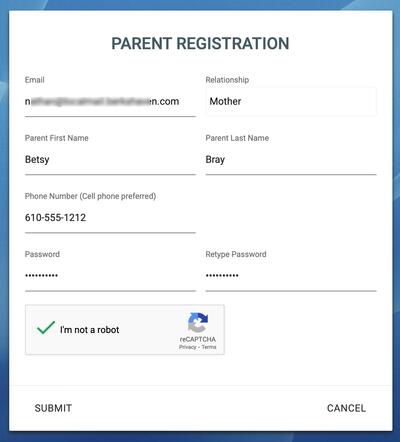
Step 2
Fill in parent email, name, phone, and create a password.
*Note that it will be easiest if you use the same email that you listed for Guardian 1 when registering your child.
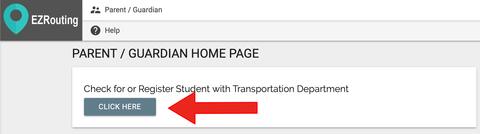
Step 3
If your student is already listed, skip ahead to Step 6
If you do not already see a student thumbnail/name, use the "Click Here" button below "Check for or Register Student with Transportation Department." Please note, you cannot register a new student from this portal. New students must be registered according to the instructions.

Step 4
Fill in your student's first name, last name, and date of birth, as they appear on school records. As long as those three items match our student information system, red text will appear to offer to link a student. Click "link student."
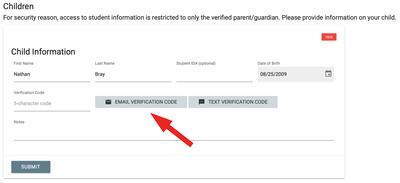
You may repeat this process for any student within your family.
Step 5
For your safety and security, you will need a verification code. Click "Email Verification Code" to have a short code sent to the primary guardian's email address that we have on file. When you receive the code, enter it in the "Verification Code" field, and click submit.
If you do not have access to the primary guardian's email, click submit to be placed into our manual verification queue and our office staff will confirm that you are an authorized parent on file.
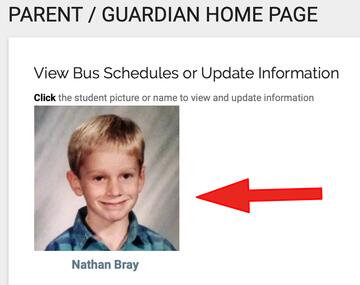
Step 6
Click on your student's thumbnail or name
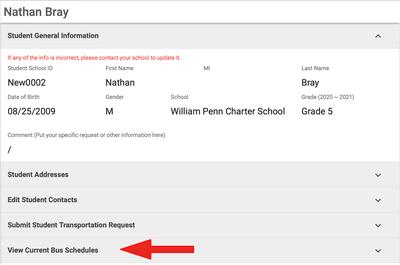
Step 7
Click on View Current Bus Schedules in the expanding sections on the left
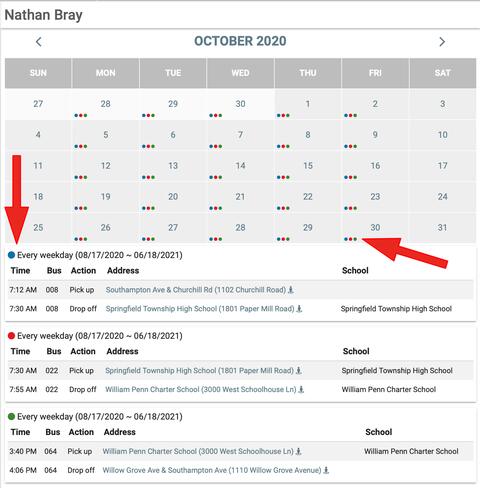
Step 8
The current bus schedule is now available for viewing. Each colored dot on the calendar view represents a segment of transportation for the day.
The sections below the calendar detail the time, bus number, and each bus stop. Clicking on bus stops or schools will display them on the map so that you may view exact locations.
Having trouble? When in doubt, email or call transportation at 215-233-6095.
Please remember that students are required to be outside and visible at their bus stop 5 minutes prior to their scheduled pickup time.
| Using the BusQuest Mobile App | |
|---|---|
 |
Step 1Download the BusQuest App from the Apple App Store or Google Play Store *Note that we are not currently able to support bus tracking in the BusQuest App. |
 |
Step 2Launch the BusQuest App and tap on "Create Parent Account" |
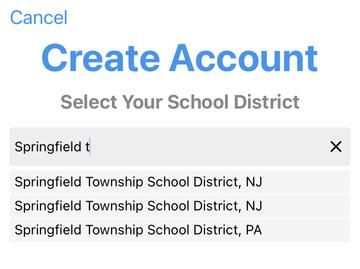 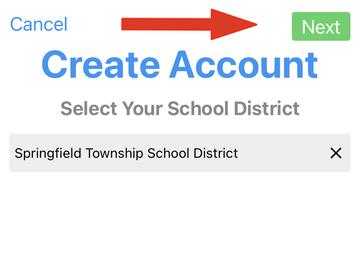 |
Step 3Begin to type Springfield Township into the search bar, and then tap Springfield Township School District, PA to select it. Click "Next" in the upper right. |
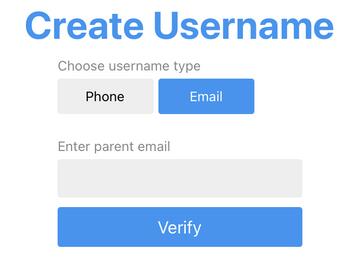 |
Step 4Create a user name, and tap Verify. At this time, we recommend using an email address rather than a phone number. *Note that it will be easiest if you use the same email that you listed for Guardian 1 when registering your child. |
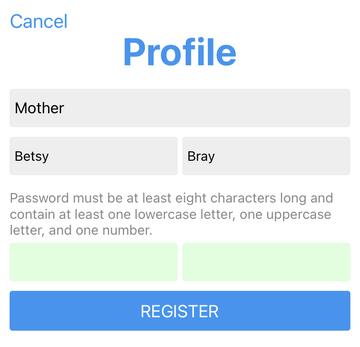 |
Step 5Enter your relationship to the child(ren) that you're adding, your first and last name, and a password. Tap Register At this time, you may be logged out of the system. Simply enter your new user ID and password to log in. |
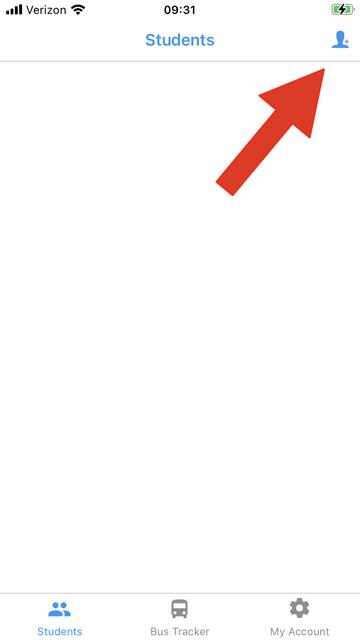 |
Step 6If you already see your student(s) listed, skip to Step 10. If you do not see students listed, tap the add student button in the upper right-hand corner. |
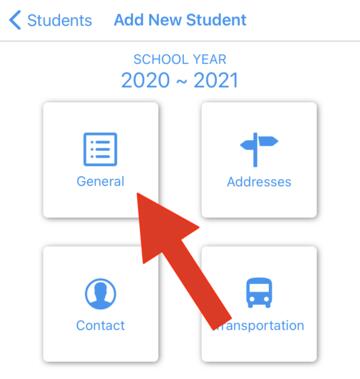 |
Step 7Tap the "General" tile to enter information for your first student. |
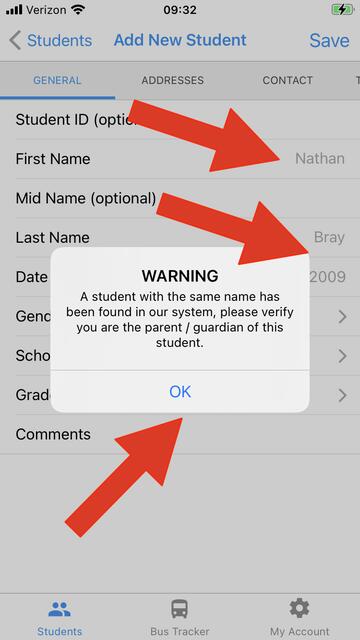 |
Step 8Enter your child's first and last name as they appear on our school records, and date of birth. After selecting a birthdate, you should get a message on screen that a student matches in our system. Tap OK to be taken to the verification screen. |
 |
Step 9Tap on Send Verification Code to have a five digit code sent to the primary guardian email address already on file in our system. When you have retrieved that code, enter it in the Verification Code Field and tap Save in the upper right. If you do not have access to the primary guardian's email, tap save in the upper right corner to be placed into our manual verification queue and our office staff will confirm that you are an authorized parent on file. |
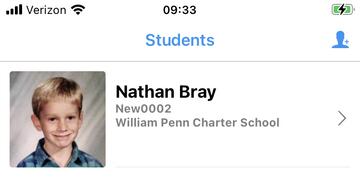 |
Step 10In the students list, tap on the thumbnail/name of the child you wish to view, then tap on the Bus Schedules tile to view current transportation information. |